Problem
We upgraded our internet service a few months ago, but our old cables in the wall were too slow (CAT 4) compared to the new network. We found super-long replacement cables at a discount, ran them under the house, but instead of using a conventional plug cover such that a second cable is connected to the end, we wanted the same cable to extend a few feet out into the room. There were sometimes odd numbers of cables – 1, 2, 3, or even 8 going through one hole. The hardware stores do not carry any wall covers for cables that handle varying number of cables or allow feeding a cable through.
Known Methods
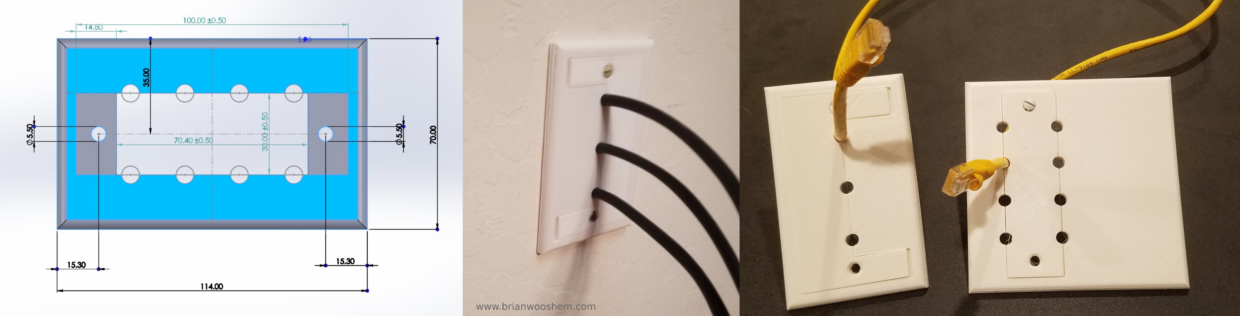
Typical wall covers are rectangular flat plastic of varying colors with small cut-outs that are fit to the specific type of plug it is intended for.
Solution
I designed my own custom wall covers & 3D printed them. 3D printing is ideal for rapidly prototyping and building small quantities of customized plastic parts with complex geometry.
Design
First, I measured the dimensions of standard wall socket covers and the Ethernet cables. Ethernet cables have a larger square “head” that cannot fit through a hole with the same diameter as the main cable.
I used a two part snap-in design for my cover so that the ends of the cables can be fed into the outer part, then the inner part is put in and fastened down with the screws into the wall to clamp the cables in place.
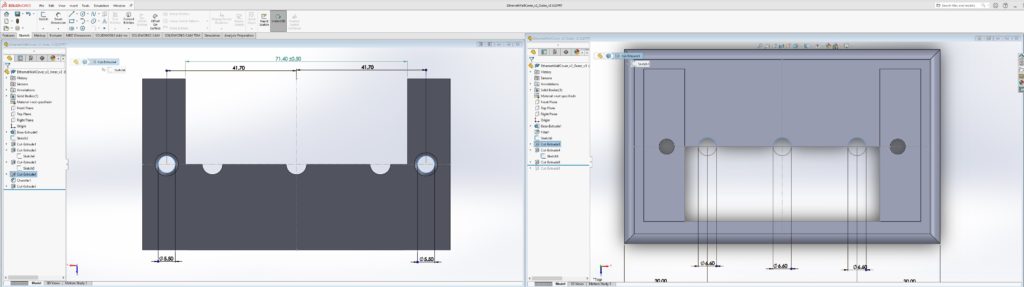
I used SolidWorks (a common Computer Aided Design, or CAD software) to create computer models of 3D printed cable covers.
Fabrication
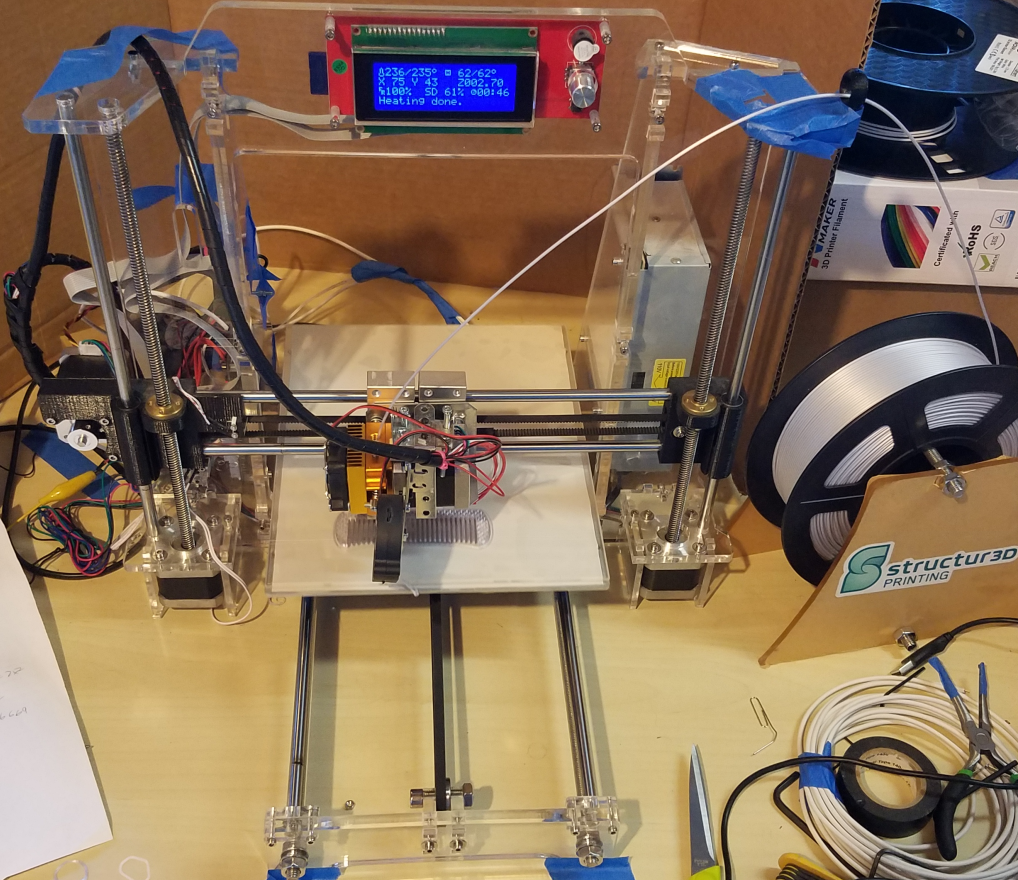
Covers were built using my 3D printer – an older Prusa i3 clone with a mostly acrylic frame that I bought used at a large discount during the pandemic. It is shown here printing another part, but the process for the covers is identical.
Testing & Iteration
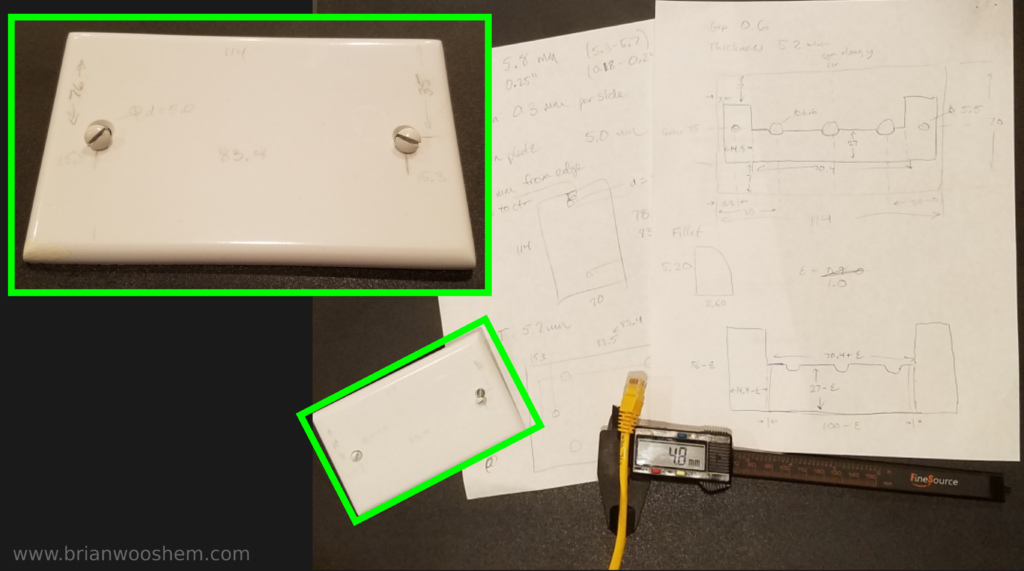
When designing parts from scratch, despite my best efforts there are often mistakes or things that do not match. Much of this is caused by variability in the 3D printer – for example, the filament tends to expand beyond the nominal, or expected, dimensions but it is hard to predict because it varies by shape, filament type, infill, and other factors.
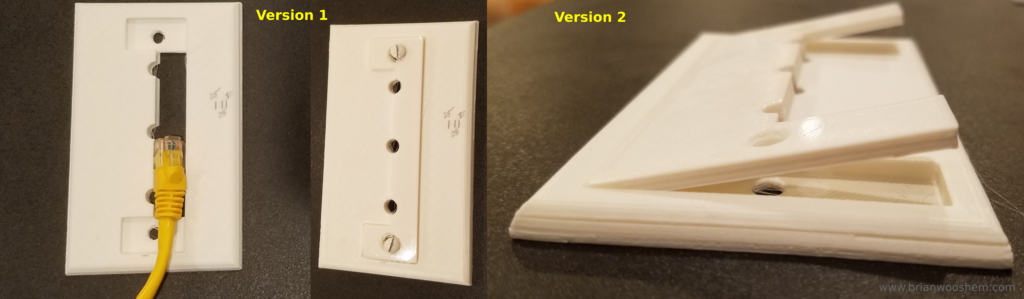
My first version was not quite wide enough to fit the cable, and the printer added an extra half millimeter of height between the base cover and the inner part, so that the top was not flat. The second version had too tight tolerances in the width of the cut out and inner part, so it did not fit in. While the CAD model would theoretically fit in both cases, the printer added enough extra material on the sides because of wall expansion so it did not fit in reality.
Once I understand the issues on my prototypes, I quickly edit my CAD to address the issue and reprint, losing only a few hours of printer time and a very small amount of plastic filament on each attempt.
Final Design
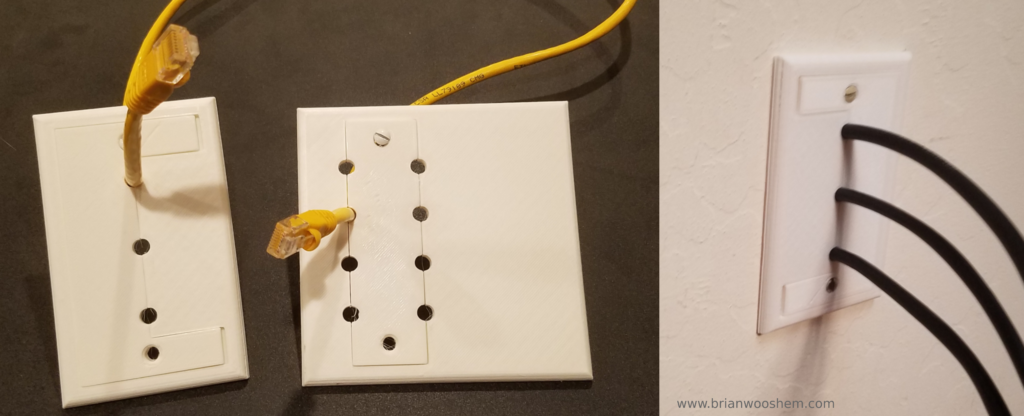
After correcting for the change in dimensions in the printed part compared to my CAD models, the third attempt was a success. Shown here are the 3 port and 8 port versions. The 8 port is intentionally offset to cover up a bigger hole we accidentally made when installing the wires – another benefit of using 3D printing to fabricate my own parts is that I can make one-off changes for a particular situation.
Edit: I uploaded these designs to Thingiverse to make them available to others, free for any noncommercial use. Feel free to print and modify your own if you need to install some cables!